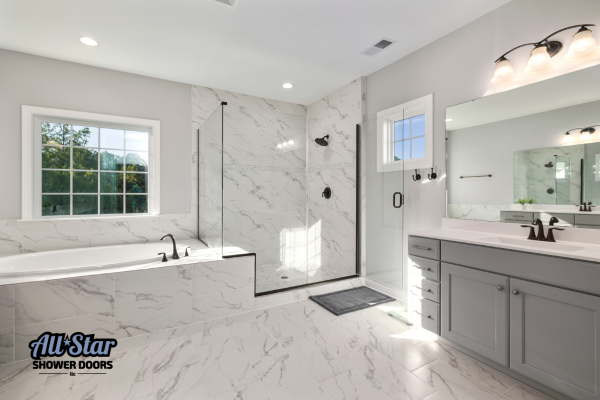
3 Steps to Install Your Semi-Frameless Shower Door
3 Steps to Install Your Semi-Frameless Shower Door
Installing a semi-frameless shower door can elevate the look and functionality of your bathroom. By following these simple steps—measuring and marking the area, attaching the hinges, and securing the door panel—you'll achieve a professional-quality installation. Add finishing touches like sealant application to ensure a sleek, watertight finish.
Key Takeaways
Measure and Mark: Measure the shower opening at top, bottom, and sides to ensure precise fitting.
Attach Hinges: Secure the hinges to the glass door with gaskets to protect against damage.
Secure the Door: Align and attach the door panel to the pre-installed hinges, adjusting for smooth operation.
Seal and Finish: Apply silicone sealant to ensure a watertight, polished result.
Custom HTML/CSS/JAVASCRIPT
Step 1: Measure and Mark the Area
Accurate measurements are crucial for a seamless installation. Here's how to measure and mark the area:
Width Measurement: Measure the width at the top, middle, and bottom of the shower opening. If there are discrepancies, use the smallest measurement to avoid fitting issues.
Height Measurement: Measure the height on both the left and right sides of the opening to ensure the door won’t be too short or tall.
Mark the Installation Points: Use a level to mark the points where the door frame and hinges will be installed. This ensures the door hangs straight and operates properly.
Tools Needed:
Tape measure
Level
Pencil or marker

Step 2: Attach the Hinges
Hinge installation is critical for ensuring the door is securely attached without damaging the glass. Follow these steps:
Prepare the Door: Lay the glass door on a flat, protected surface with the hinge side accessible.
Position the Hinges: Align the hinges with the pre-marked positions on the door's edge. Ensure you place gaskets or rubber seals between the metal hinges and the glass for added protection.
Secure the Hinges: Use a screwdriver or drill to attach the hinges. Tighten the screws snugly but avoid over-tightening, which could stress or crack the glass.
Tools Needed:
Screwdriver or drill
Protective padding for the work surface
Rubber gaskets (provided with the hinges)
Step 3: Secure the Door Panel
The final step involves attaching the door panel to the shower frame. Here's how:
Position the Door: With assistance, carefully lift the door panel and align it with the pre-installed hinge brackets on the wall or frame.
Attach the Door: Insert screws or pins through the hinge brackets into the door panel. Tighten securely, but avoid over-tightening.
Check Alignment: Ensure the door swings freely and aligns perfectly with the shower frame. Adjust the hinges as needed to correct any gaps or misalignment.
Tools Needed:
Helper for lifting the glass door
Screwdriver or drill
Manufacturer’s instructions for hinge adjustment
Seal and Finishing Touches
With the door installed, the final steps ensure it’s watertight and aesthetically polished:
Apply Silicone Sealant: Use a high-quality, bathroom-grade silicone sealant to fill gaps where the door frame meets the wall and shower base. Smooth the sealant with a caulking tool or your finger for a clean finish.
Clean and Inspect: Wipe down the glass and hardware with a soft cloth to remove fingerprints or smudges. Check the door's functionality and make any final adjustments.
Tools Needed:
Silicone sealant
Caulking gun
Soft cloth
Glass cleaner
Custom HTML/CSS/JAVASCRIPT
Frequently Asked Questions
Can a Semi-Frameless Shower Door Be Installed on Any Type of Shower Base?
Yes, but compatibility depends on the shower base material (tile, acrylic, or fiberglass). Always use the correct drill bits and fasteners for the material.
What Do I Do If the Door Starts to Sag?
If the door sags, check the hinges and tighten any loose screws. If the issue persists, adjust the alignment using the manufacturer's instructions.
How Do I Maintain a Semi-Frameless Shower Door?
To keep your shower door in top condition, clean it regularly with mild detergent and a soft cloth. Wipe down the glass after each use to prevent water spots.

Conclusion
With the right tools, precise measurements, and careful execution, installing a semi-frameless shower door is a manageable DIY project. From marking the area to securing the hinges and sealing the edges, each step ensures a functional and visually appealing result. Celebrate your success—you’ve added a sleek, modern touch to your bathroom!
Ready to upgrade your bathroom? Contact All-Star Shower Doors today for expert installation services!


